Prerequisites
You’ll need:
- Rootly account with admin permissions
- Slack workspace admin or owner access
- For Enterprise Grid: Org Owner or Org Admin role
Required Permissions
Rootly requests the following Slack permissions during installation.Bot Scopes (Core)
Bot Scopes (Core)
Bot Scopes (AI & Assistant)
Bot Scopes (AI & Assistant)
User Scopes
User Scopes
When bot cannot create channels (some workspaces restrict this):
Enterprise Grid Scopes
Enterprise Grid Scopes
Choose Your Plan
Slack Free, Pro, or Business+
Single workspace installation. Most common setup for teams on standard Slack plans.
Slack Enterprise Grid
Organization-level installation with multi-workspace support. Requires Org Owner/Admin.
Slack Free, Pro, and Business+
1
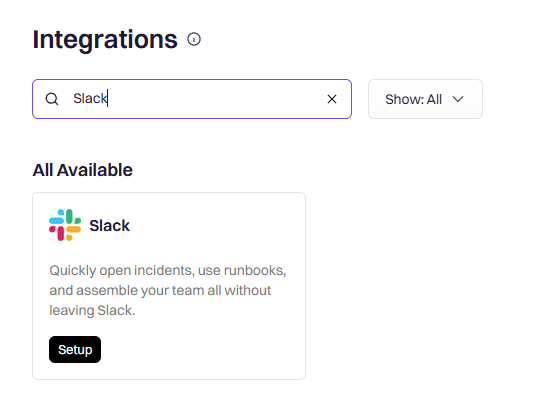
Open Integrations
In Rootly, go to Configuration → Integrations and search for Slack. Click Setup.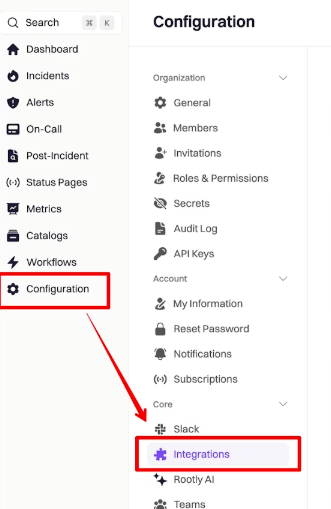
2
Select Your Plan
Choose Other Slack Plans (this covers Free, Pro, and Business+).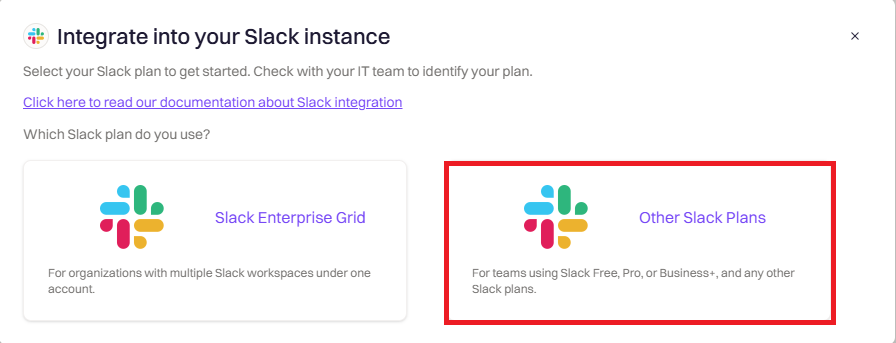
3
Authorize in Slack
You’ll be redirected to Slack. Verify you’re installing to the correct workspace (check the dropdown in the top right), then click Allow.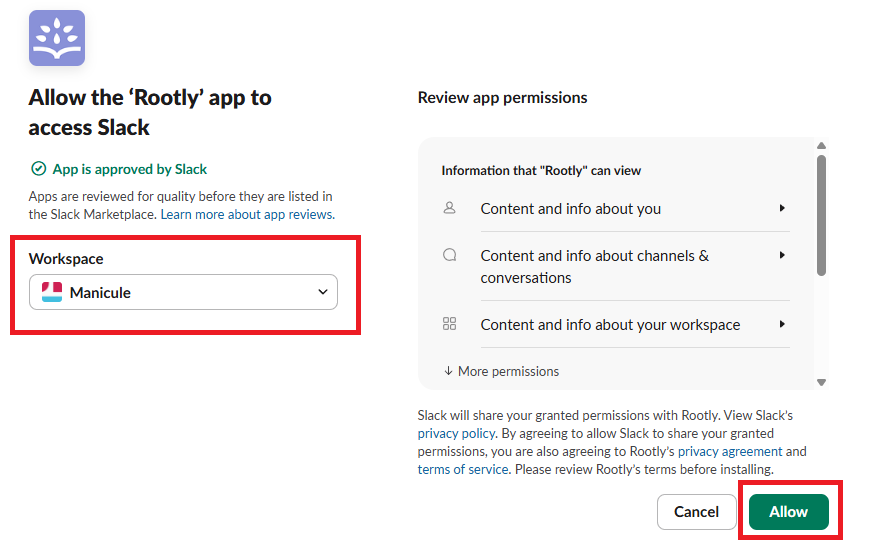
4
Confirm Connection
You’ll be redirected back to Rootly. The integration should show as Connected.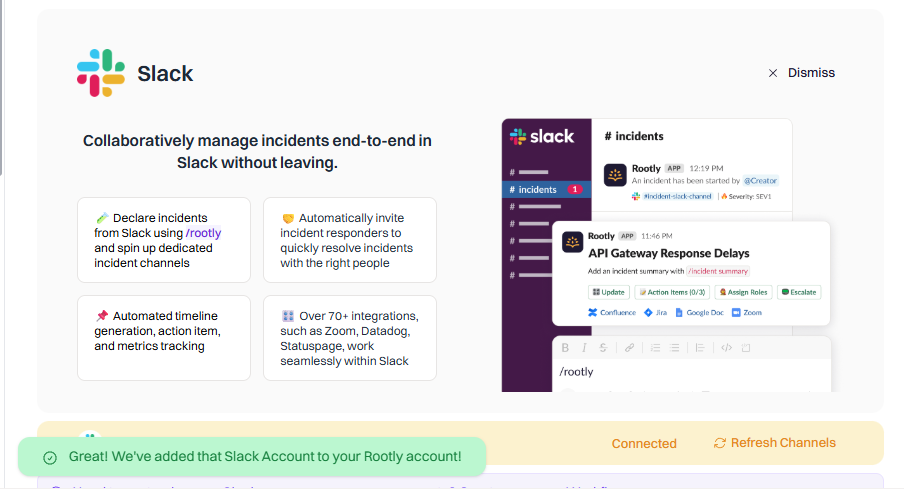
Slack Enterprise Grid
With Enterprise Grid, you install Rootly at the organization level, then add it to specific workspaces. This lets you manage incidents across multiple workspaces from a single Rootly account.1
Open Integrations
In Rootly, go to Configuration → Integrations and search for Slack. Click Setup.
2
Select Enterprise Grid
Choose Slack Enterprise Grid.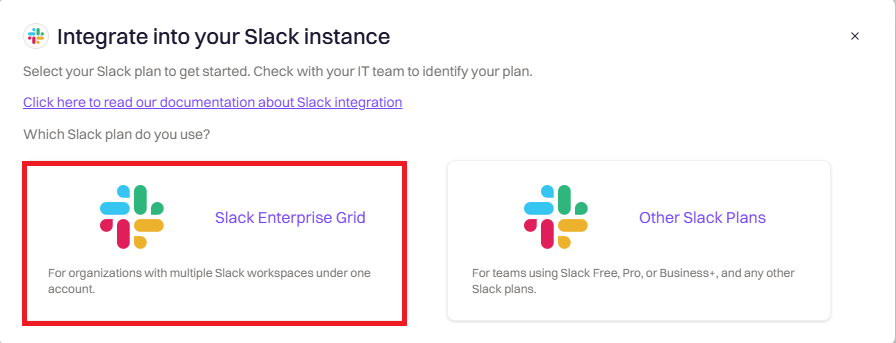
3
Install at Organization Level
You’ll be redirected to Slack. Before clicking Allow, verify you’re installing at the organization level (not a single workspace).Click Allow to approve Rootly as an organization-wide app.
4
Add Rootly to Workspaces
After authorization, switch to your Slack Enterprise Grid admin portal:
- Go to Organization Settings → Integrations → Installed Apps
- Find Rootly in the list
- Click the menu and select Add to more workspaces
- Select which workspaces should have access to Rootly
- Click Next and Allow
5
Configure Incident Workspace
Return to Rootly and go to Integrations → Slack → Configure:
- Select incident workspace — Choose which workspace will host your dedicated incident channels
- Set announcement channel — Choose where new incidents are announced
- Set alerts channel — Choose where alerts are posted
- Click Save Settings
6
Set Up Shared Channels (Recommended)
For cross-workspace visibility, create a shared incident channel:
- In Slack, create or select a channel (e.g.,
#incidents) - Click the channel name → Settings → Workspaces with access
- Add all workspaces that should see incident announcements
Switching From a Workspace Install to Enterprise Grid
If Rootly was originally installed at the workspace level (Slack Free / Pro / Business+) and you now want Enterprise Grid features — multi-workspace channel selection, Forms across workspaces, pin-to-timeline, shared cross-workspace incident channels — you need to disconnect and reinstall Rootly with the Enterprise Grid option selected.What’s Preserved Across The Reinstall
Disconnecting and reinstalling the Slack integration only resets the Slack integration’s own settings — the broader Rootly configuration around it stays intact. Specifically:
Existing workflow actions that reference specific Slack channels or users do not need to be edited after the reinstall — as long as Rootly is re-added to every workspace that hosts those channels or users during the Enterprise Grid install. Channel and user references are stored on the Rootly side and continue to resolve correctly once Rootly is present in the workspace again. You gain the ability to change which workspace a channel is selected from going forward, but you don’t have to retroactively update anything. If Rootly is not added back to a workspace, actions that reference channels or users in that workspace will fail at execution time — this is the biggest reason to be deliberate about which workspaces you add Rootly to during Step 2.
Procedure
1
Disconnect The Existing Slack Integration
In Rootly, go to Configuration → Integrations, find Slack, click Connected to reveal the disconnect option, then click Disconnect.See Uninstall for the full disconnect steps, including how to also remove Rootly from your Slack workspace (recommended before reinstalling to avoid lingering app state).
2
Reconnect And Choose Enterprise Grid
Restart the installation flow from Configuration → Integrations → Slack → Setup. When the install-mode prompt appears, choose Slack Enterprise Grid and follow the Enterprise Grid install steps above.You must be an Org Owner or Org Admin to complete the Enterprise Grid setup — the install happens at the Slack organization level, so workspace-level roles aren’t sufficient on their own. If your account doesn’t have the required role, ask an Org Owner or Org Admin to complete this step.
3
Reconfigure Slack-Specific Settings
After the Enterprise Grid install completes, set:
- The incident workspace (which workspace hosts dedicated incident channels)
- The announcement channel
- The alerts channel
- Smart Defaults as needed
4
Verify Existing Workflows Still Reference Valid Channels
Open a few of your most-used incident workflows and confirm their Slack actions still resolve to the expected channels. In almost every case they will — references are preserved across the reinstall — but spot-checking a couple of high-traffic workflows gives you a sanity check before the next incident.
If your organization isn’t on a Slack Enterprise Grid plan, the Enterprise Grid option won’t appear during the install flow. See the Enterprise Grid option not showing accordion in Troubleshooting below for the most common causes.
Re-Claiming the /incident Command
During the transition to Rootly, you may experience issues where Rootly’s bot claims the/incident Slack command from your existing bot. When multiple bots use the same command, Slack will always invoke the one that was installed most recently. If this interrupts your transition, follow the steps below to reclaim the /incident command from Rootly.
Option 1 (Recommended)
This is the safest method — it does not result in a blackout period where your old bot is unusable.- Ensure Rootly is already installed on your Slack workspace.
- Update your old bot’s Slack command from
/incidentto a placeholder (e.g.,/incident-1). - Save the change.
- Change the command of your old bot back to
/incident.
/incident command.
Option 2
If Option 1 does not work, try this option. There will be a brief blackout period where your old bot is unusable.- Ensure Rootly is already installed on your Slack workspace.
- Uninstall your old bot.
- Reinstall your old bot.
/incident command from Rootly.
Enterprise Grid Consideration
If the issue persists after trying the above, check your installation scope. If Rootly is installed at the Slack organization level (Slack Enterprise Grid), you must also reinstall your old bot at the Slack organization level, not just at the workspace level.Uninstall
To remove the Slack integration:- Go to Configuration → Integrations and find Slack
- Click Connected to reveal the disconnect option
- Click Disconnect
Troubleshooting
Workspace not showing during installation
Workspace not showing during installation
Causes:
- You’re not an Admin or Owner of the workspace
- Workspace doesn’t allow members to install apps
- Logged into wrong Slack account
- Ask a Slack Admin/Owner to install Rootly
- Check Slack → Settings & Permissions → App Management
- Try in a private browser window with the correct Slack account
Enterprise Grid option not showing
Enterprise Grid option not showing
Causes:
- Your org isn’t on Enterprise Grid
- You’re not an Org Owner/Admin
- Logged into a non-Grid workspace
- Verify your plan at Slack’s pricing page
- Ask an Org Owner/Admin to complete installation
- Log into your Enterprise org, not a standalone workspace
Channels not being created
Channels not being created
Causes:
- Rootly bot lacks channel creation permissions
- Workspace restricts channel creation to admins
- Enable Bypass Slack permissions in Smart Defaults
- Verify Rootly has
channels:manageandgroups:writescopes - Check workflow logs for specific errors
Can't see incidents from other workspaces (Enterprise Grid)
Can't see incidents from other workspaces (Enterprise Grid)
Causes:
- Announcement channel isn’t shared across workspaces
- Rootly not added to all required workspaces
- Create a shared channel for incident announcements
- Add Rootly to all workspaces via Organization Settings → Installed Apps
Can't pin messages to incident timelines 📌
Can't pin messages to incident timelines 📌
If you’re on Slack Enterprise Grid and pinning messages to the incident timeline isn’t working, this is a sign that your Slack integration was installed as a non-Grid (single-workspace) installation rather than at the organization level.
Solutions:
Solutions:
- Disconnect the Slack integration from Rootly
- Reconnect it, making sure to select Slack Enterprise Grid during installation and authorize at the organization level (not a single workspace)