

Using Rootly for your retrospectives
Today, your incidents run in Rootly, and the retro document gets written in Confluence, Notion, or Google Docs. This process costs you as you work through your retrospective:- You rebuild context Rootly already has. Once the document is created outside of Rootly, it becomes a snapshot of the incident at the time you hit ‘Create Document’. If your team continues brainstorming in Slack, or hopping on a bridge to discuss mitigation strategies, incorporating these updates into the document requires manual entry.
- The document drifts. As you reflect on the incident and realize that a separate service was impacted, or a timestamp was wrong, you now have two versions of the truth: what’s in your document, and what’s in Rootly.
- Action items go missing. Bullet points in a doc are commitments with no owner and no tracker. Rootly action items carry incident context, sync to Jira, Linear, or Asana, and show current status inside the retro.
Before you get started
Before you start, make sure AI in Retrospectives is enabled. Turn this on in AI & Agents settings to begin autogenerating sections of your documents. Note that, while the migration to Rootly can be done in a matter of minutes, keep your teams aware of the process changes to eliminate any confusion around which document editing tool to use.Step 1: Port your existing template
In Settings → Retrospectives → Templates review the built-in template that Rootly has already provided. This template is written with industry best practices in mind to give you a high quality retrospective document every time. If you have an existing template that looks slightly different, you can edit the default or create your own. Click New template or edit the default to begin adding your sections.Best practices
- Replace any incident fields you reference with liquid variables. For example:
- Use dynamic blocks to replace managing tables by hand.
/timeline— the interactive incident timeline, respecting your sort and filter settings/followups— action items, sortable by due date, status, or priority
- Use AI Blocks for any section someone writes from scratch.
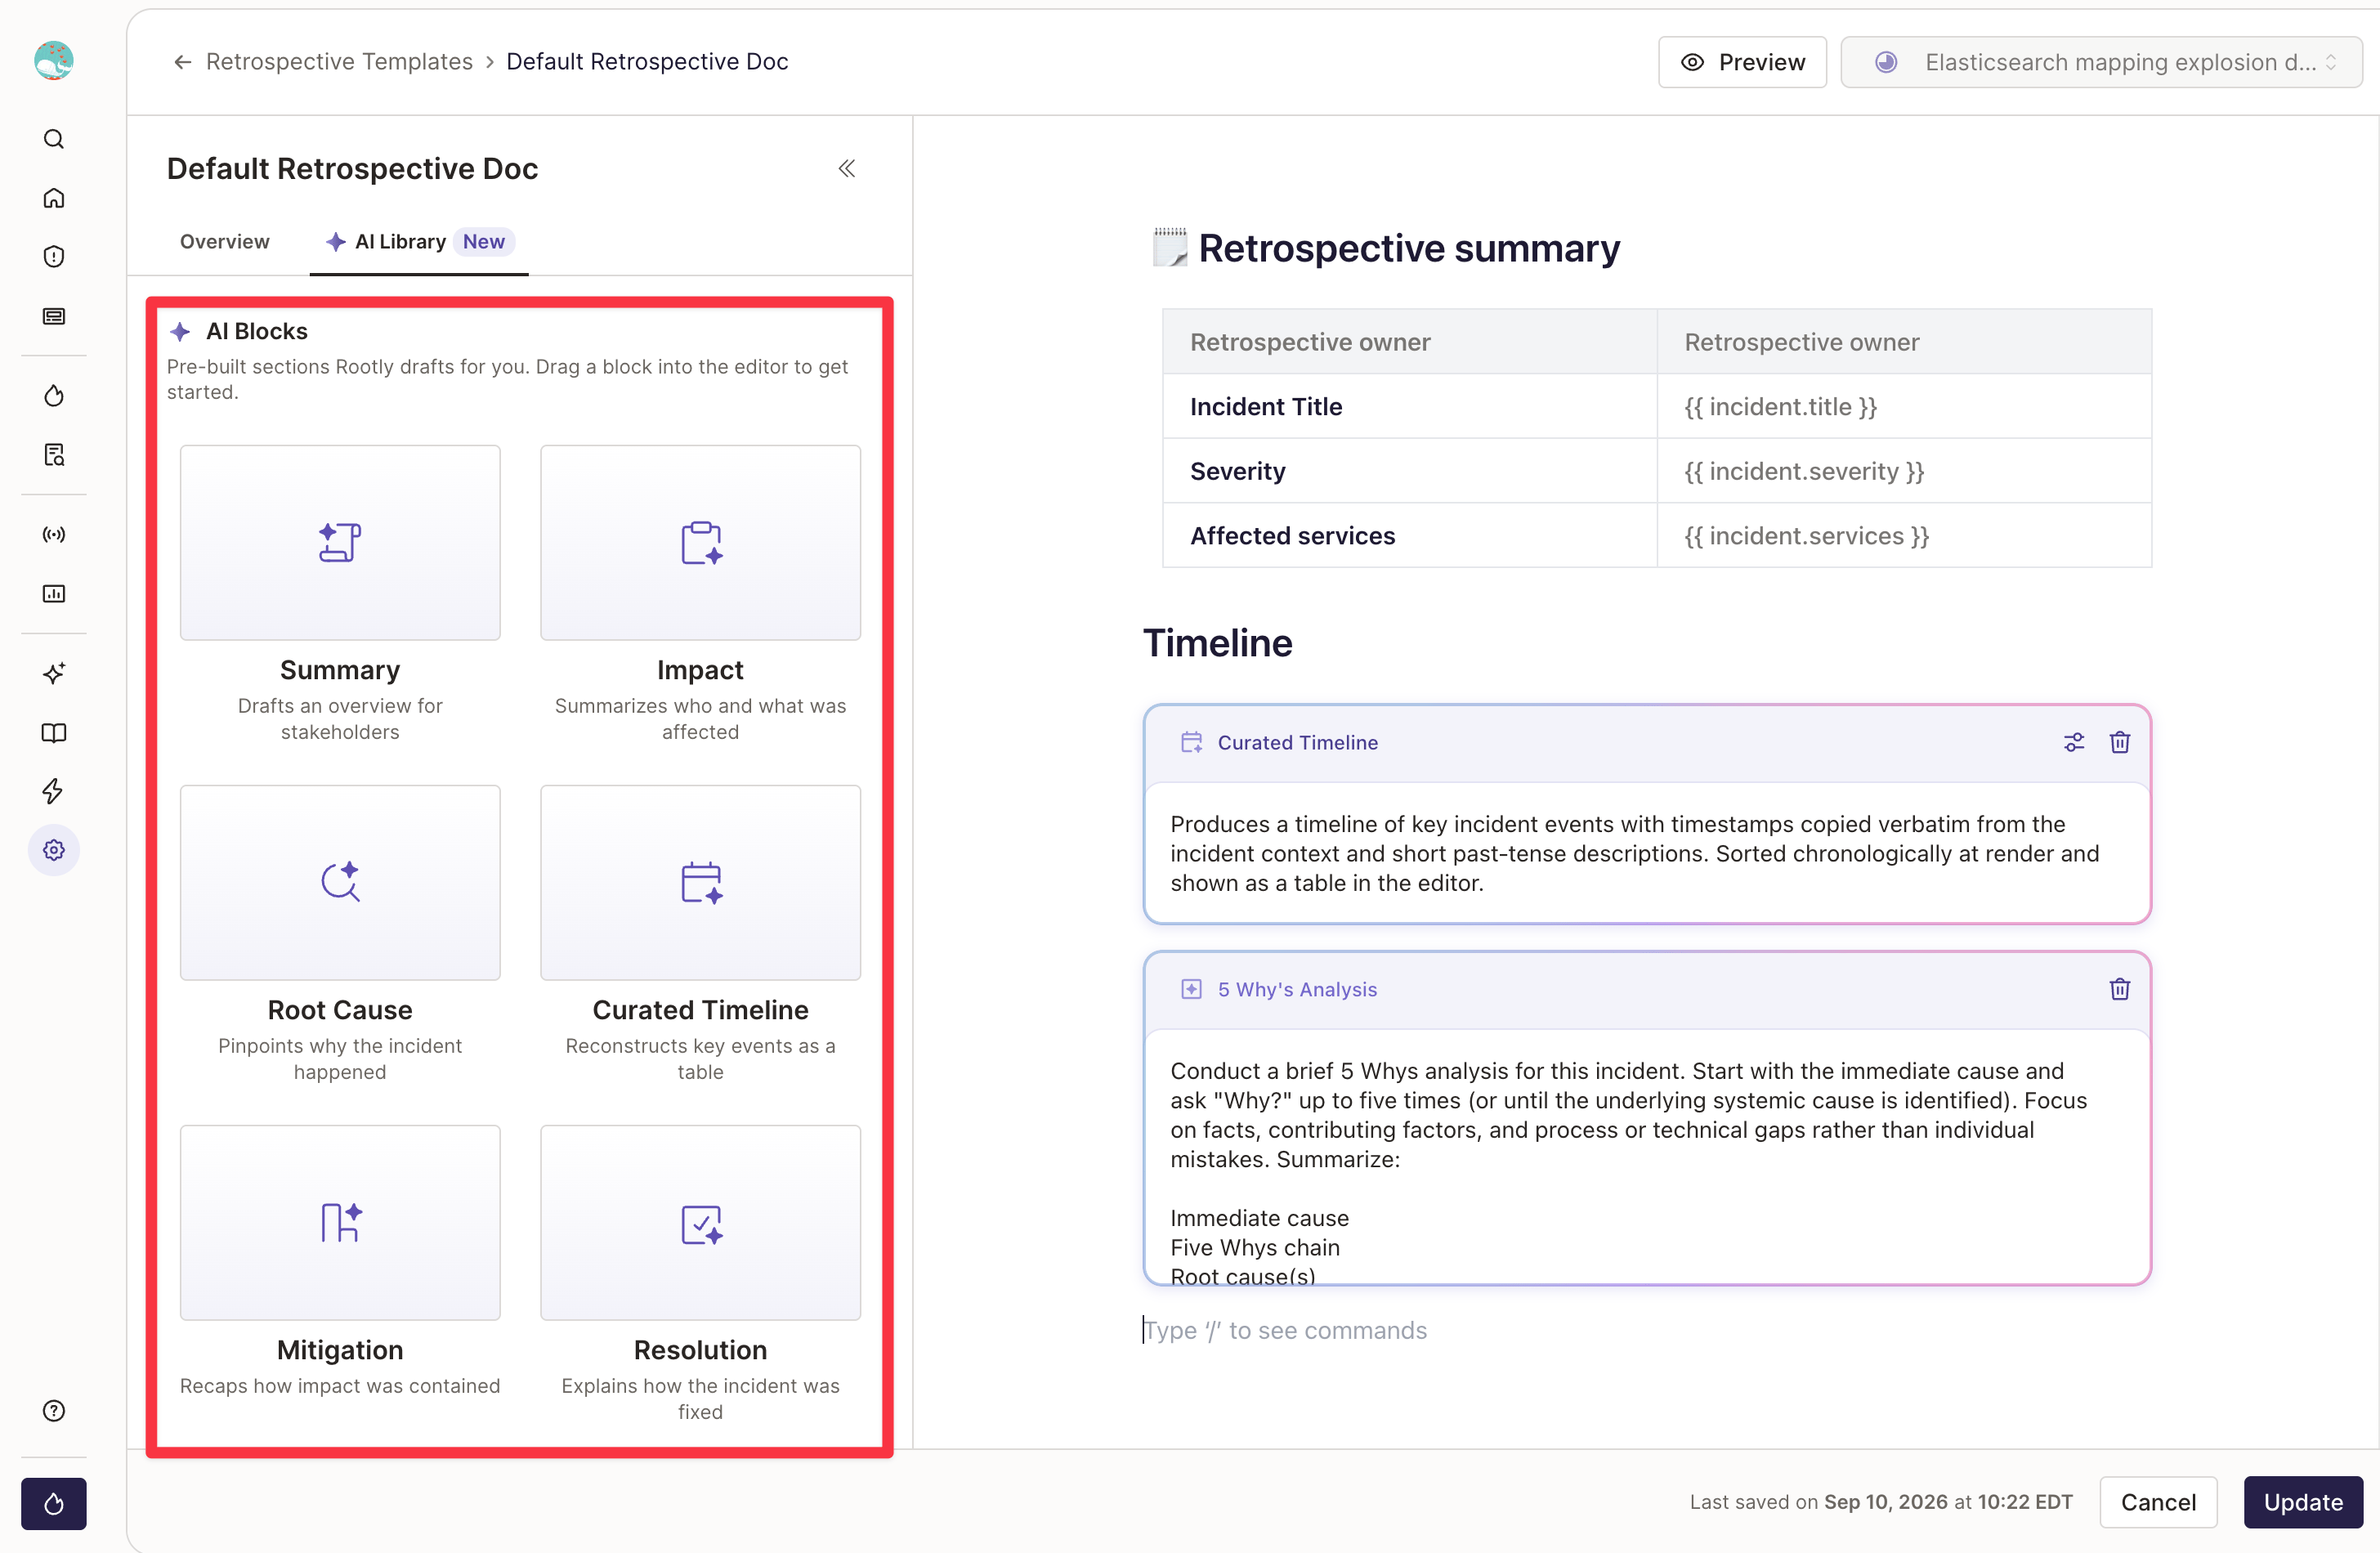
/ in the right-hand editor to add in an AI block to your template. When the retro template is applied to an incident, Rootly will take the instructions in each block, along with the incident context, to write the section automatically.
Add custom instructions to the AI blocks to customize the output to your own needs. Alternatively, use the Custom Block to write your own prompt.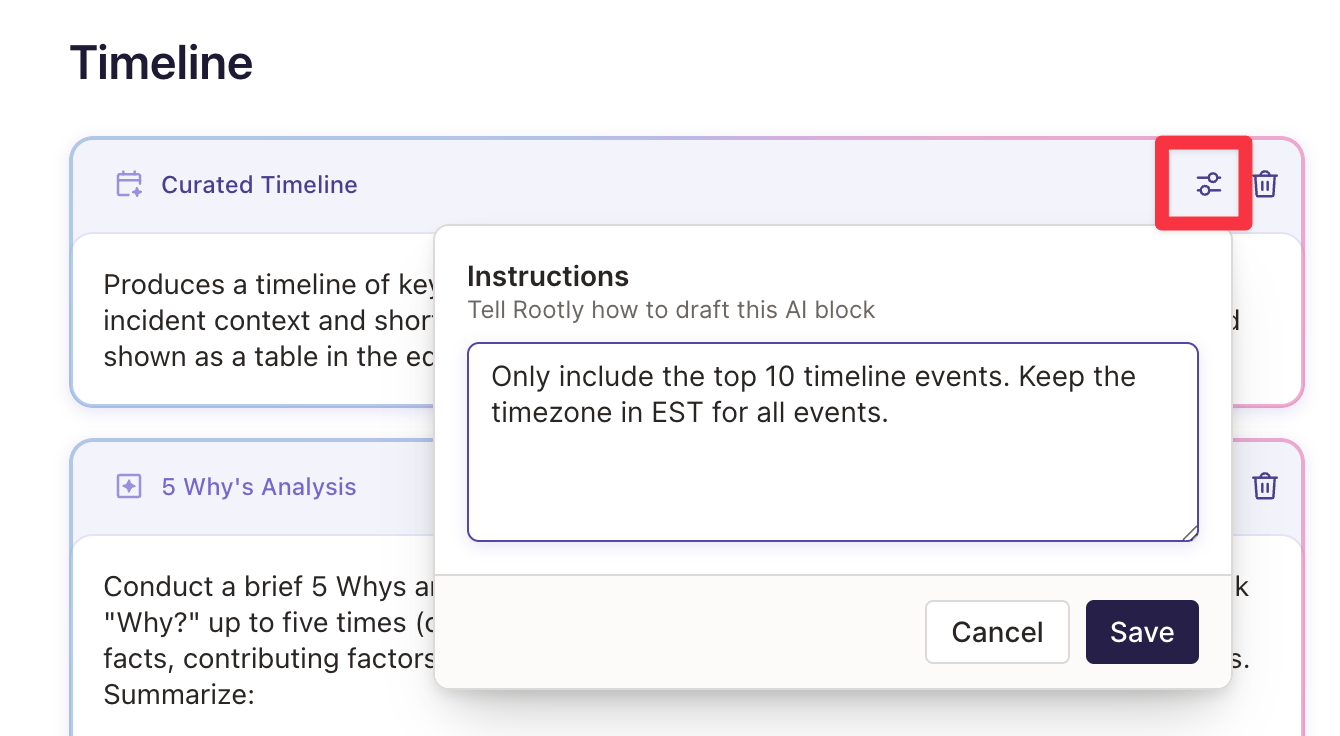
- Preview before you publish. Run the template against a real past incident to review what each block produces. It’s the fastest way to find out a block needs different instructions.
Step 2: Build a template per incident type
Different incidents can require separate documentation. A SEV0 compared to a SEV4 requires a much longer conversation and reflection to learn and prevent repeat issues, which includes a more detailed summary of the incident. Create separate retrospective templates for each type to ensure you’re getting the right level of documentation per incident. You can quickly spin up some of the common templates right in the Rootly Template builder: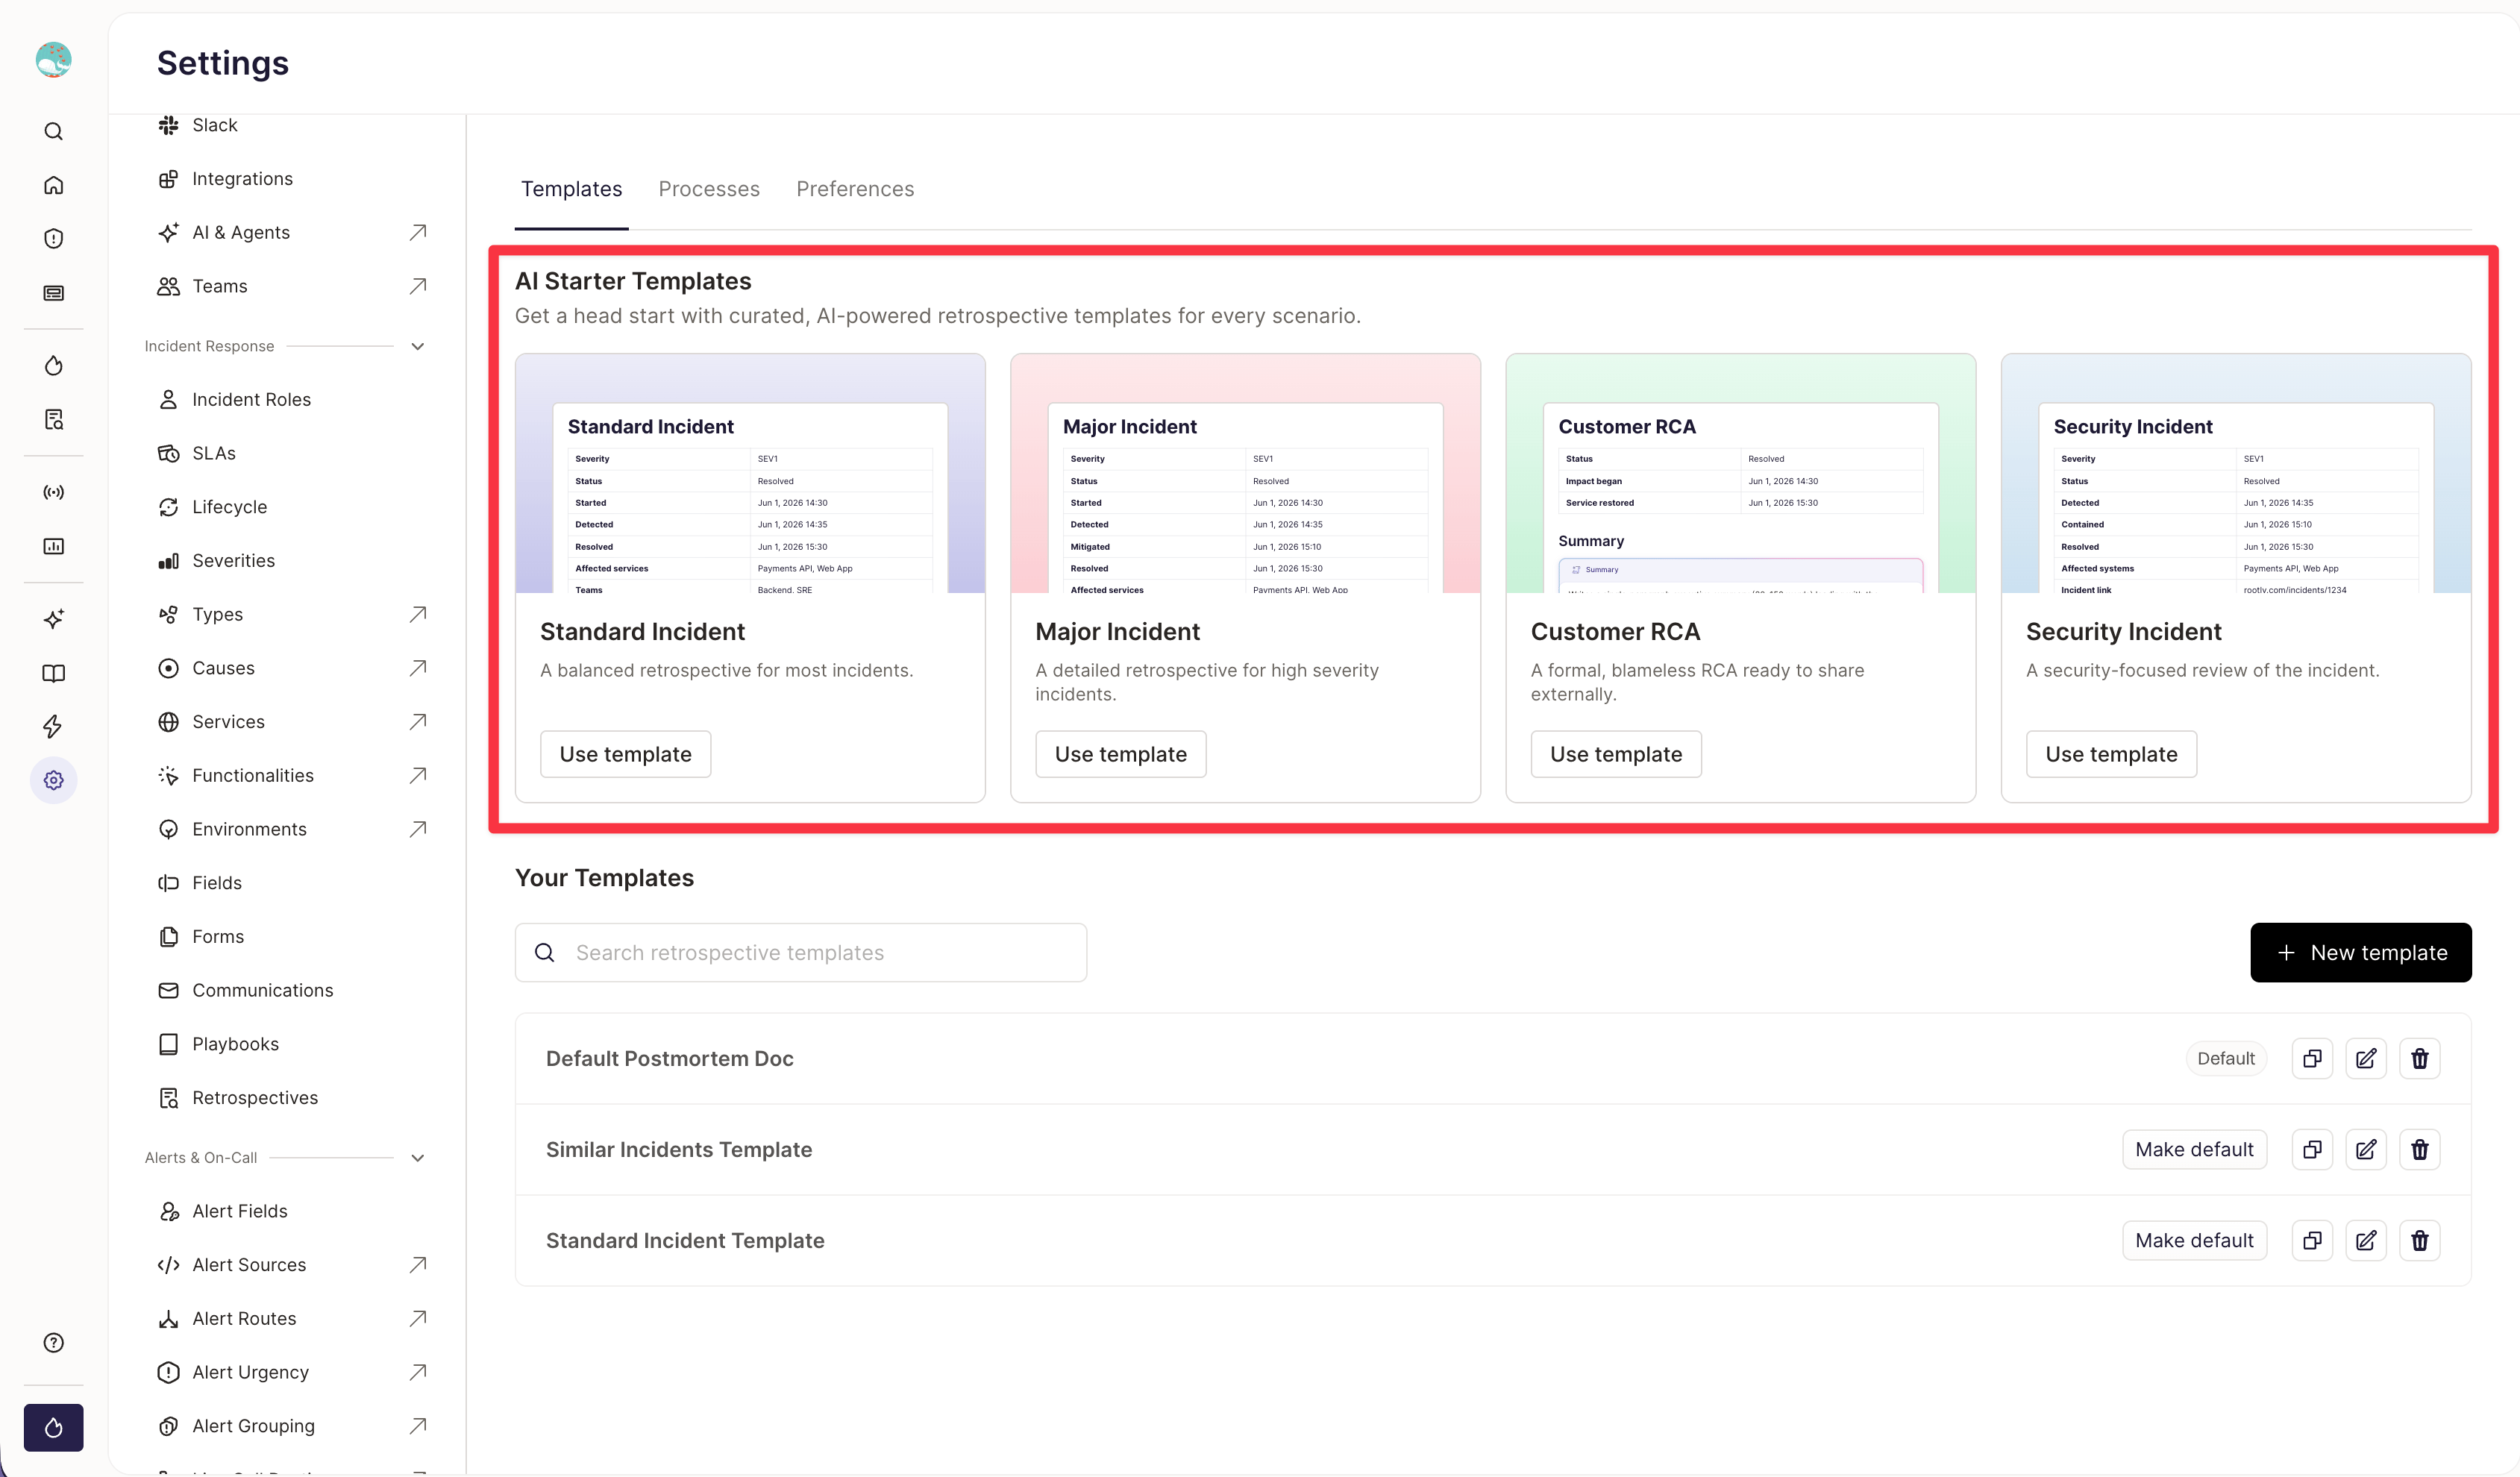
Step 3: Run your first retro in Rootly
Once you resolve your incident, you’ll be able to create a retrospective document automatically from the Rootly Web UI. Select the template you want to start with (you can use a separate template later on if you change your mind).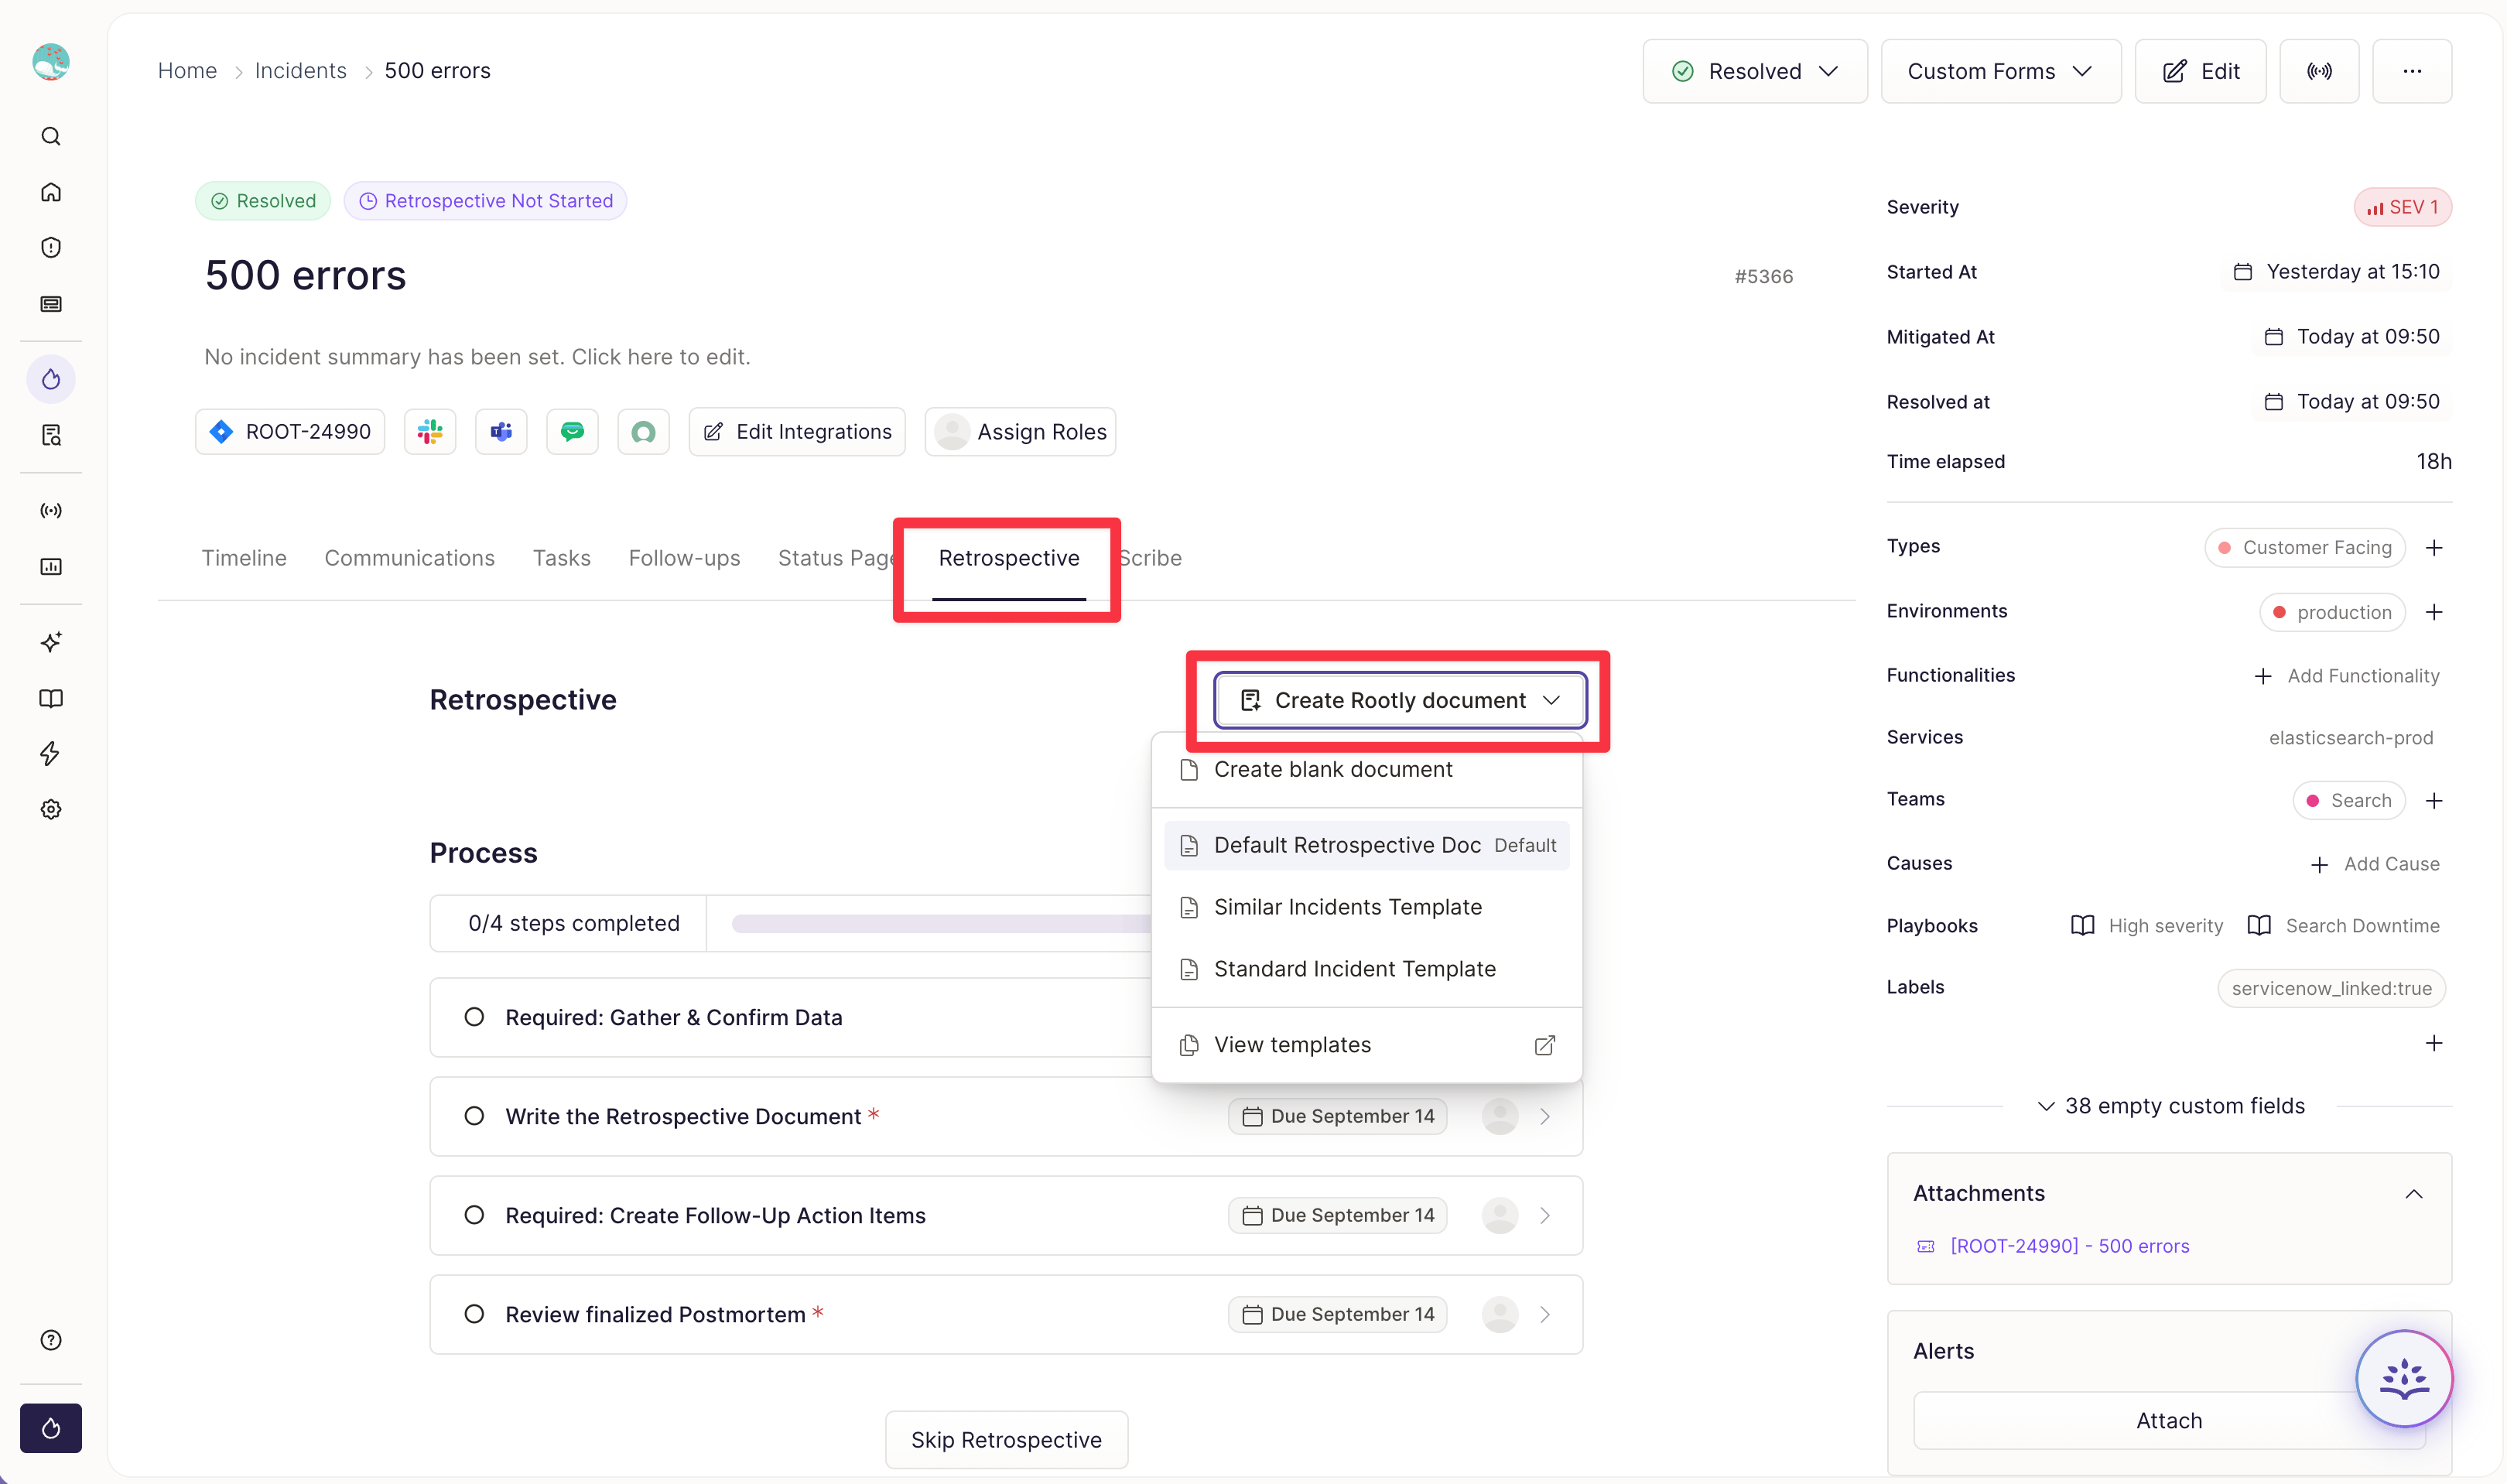
@ to mention a person or reference another incident.
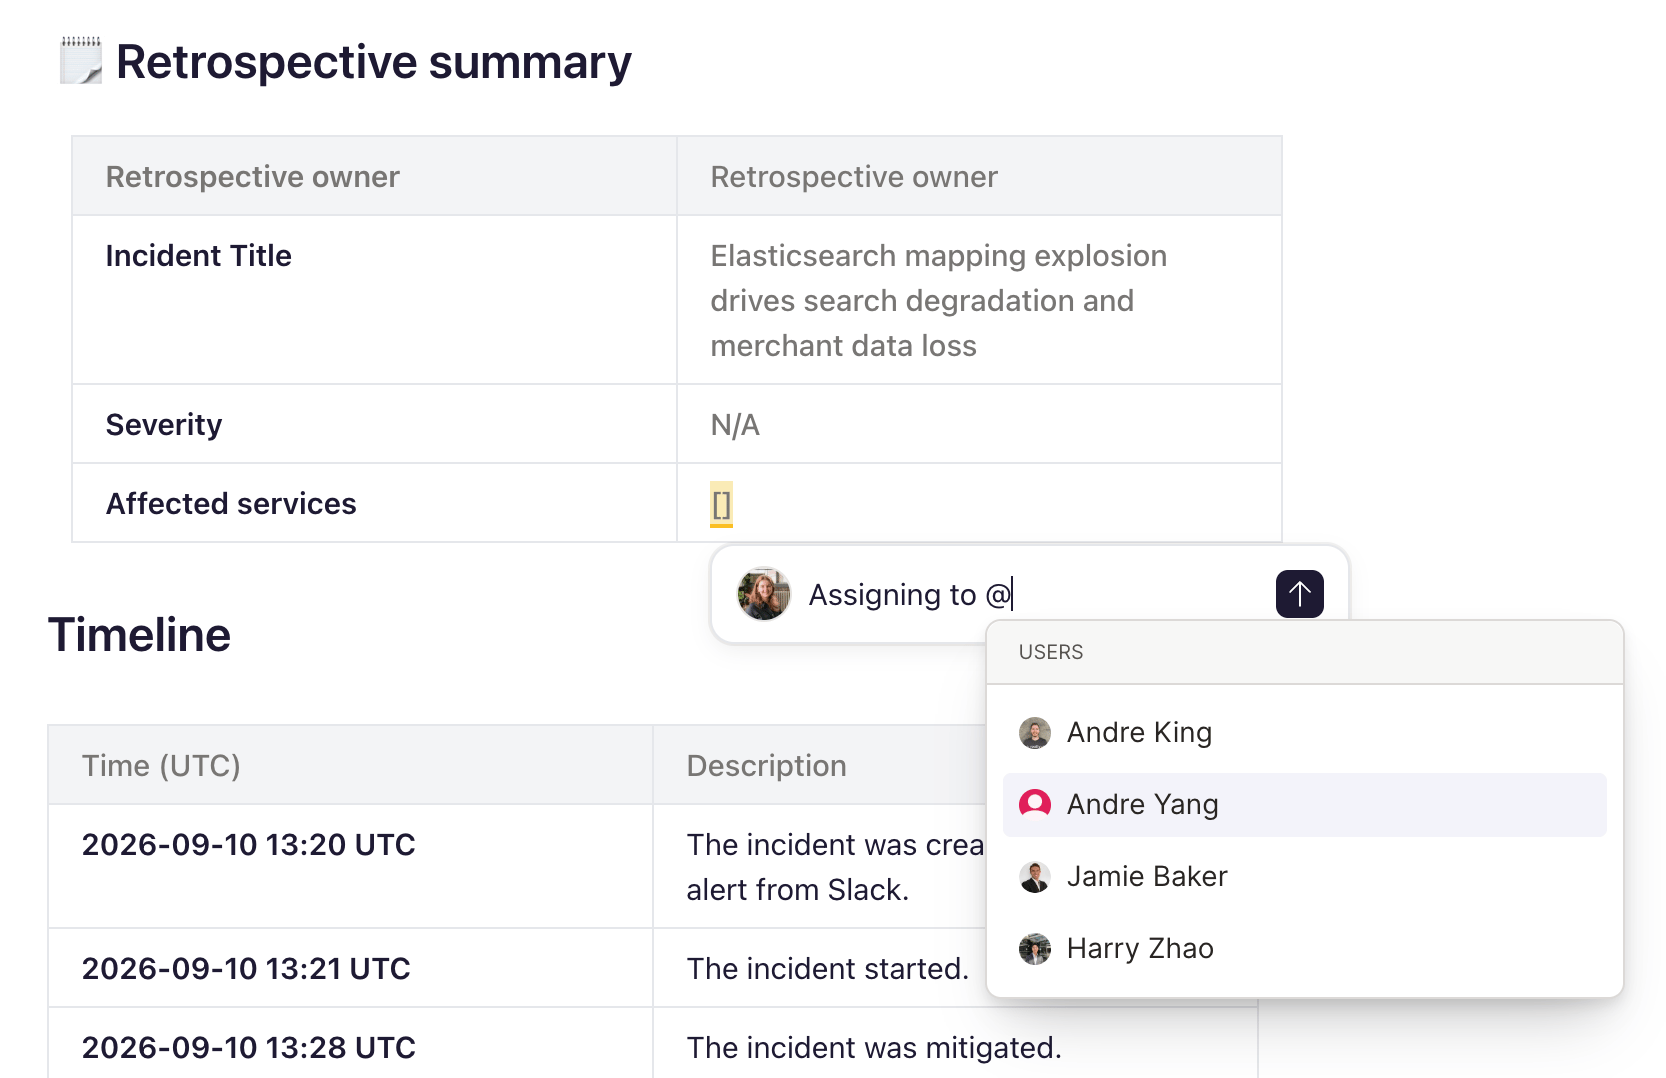
If you are currently using Workflows to create documents in Notion, Google Docs, or Confluence, this process will not conflict with those documents. As you perfect your Rootly AI template, continue using your current process until you’re ready to fully migrate your team.
Step 4: Deprecate your old process!
As mentioned above, if you were previously using Workflows in Rootly to create documents in your document editing tool, it’s recommended you continue using those workflows until your template is fully tested so that you don’t miss a retrospective. However, now that your template is ready, it’s time to deprecate your old process!- Notify your team of the change in process.
- Find the Workflows and disable them.
- Temporarily, it’s recommended that you use a workflow to post a message in the Slack channel when the incident is resolved, reminding your team to use Rootly for the retrospective document.
Best practices
Review each block’s context. Open a block’s details to view its sources — incident metadata, timeline events, the Slack channel, the bridge-call transcript. A block with less detail usually means the incident record had limited context to draw on: this can be remedied by integrating your Rootly instance into your systems using Connectors. Rewrite with AI instead of retyping. Highlight the text and ask for a rewrite in context. Be specific about audience and constraint:- “Rewrite for an executive stakeholder — no service names, three sentences.”
- “Write this for customers. Focus on impact and what we’re changing.”
- “Condense to the six most important events.”
/followups block is what turns the document into tracked work. Create action items from the retro so they carry incident context, give each an owner and a due date, and sync them to Jira, Linear, or Asana. Status flows back into the retro, so months later the document tells you whether anything happened. No name and date means it isn’t a follow-up.
Keep your wiki — export to it. Rootly is where the retro is written and stays connected to the incident; your wiki is where it’s read and archived. Export creates a new document in Confluence, Google Docs, Notion, SharePoint, Dropbox Paper, Coda, or Quip, updates one you exported earlier, downloads a PDF, or copies Markdown. AI content is fixed at export time, so export when it’s final and re-export rather than editing in two places.
Rate the blocks. Thumbs up/down feeds Rootly’s evaluation pipeline, and a consistently wrong block usually points at a per-block instruction you should be setting.
Your Rootly team can review your current retro template and map it block by block with you — ask your CSM for a working session.